At times you may wish to utilize VBA code in Outlook to achieve more functions. Yet, you do not know how to run VBA code in your Outlook. Thus, this article will expose the detailed steps to you.
Thereinafter, we will take Outlook 2010 version as an example and show you the elaborate steps, ranging from modifying macro security settings to running VBA code. Now, read on to get them.
Step 1: Enable “Developer” Tab
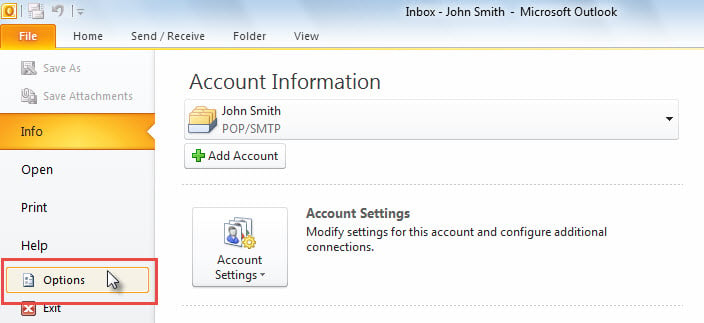
- First of all, after launching Outlook, access “File” menu.

- Then, in “File” menu, select and click on “Options”.
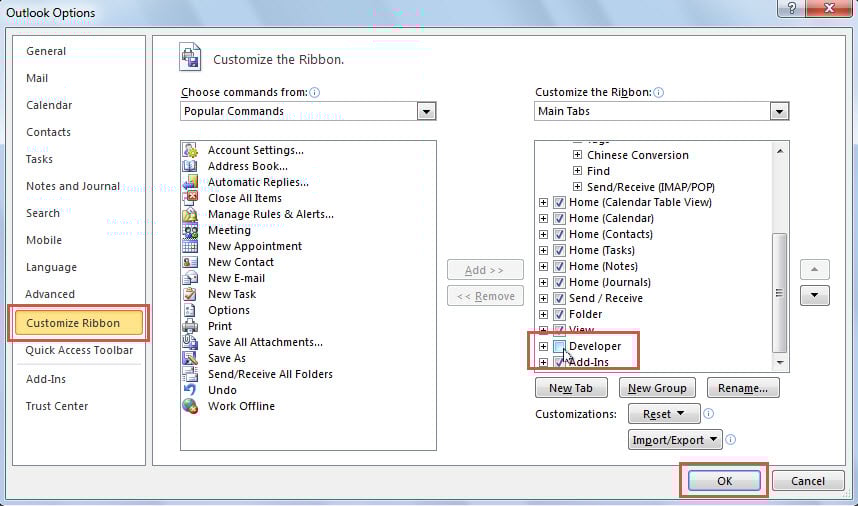
- Next, in the popup “Outlook Options” window, switch to “Customize Ribbon”.
- Later, on the right side, you can find out and enable the “Developer” tab.
- Lastly, click “OK”.
Step 2: Check Macro Security Settings
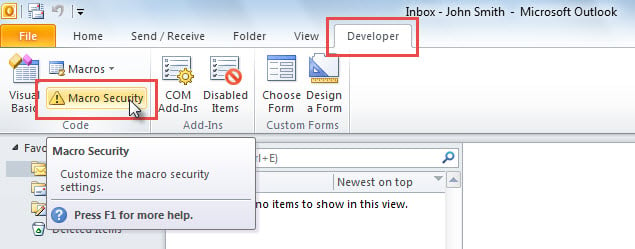
- After returning to Outlook main window, you can access “Developer” ribbon.
- Then, click on the “Macro Security” button.
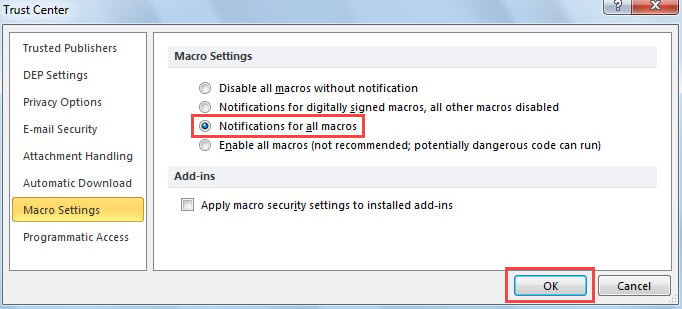
- In the subsequent screen, you should select “Notifications for all macros” and hit “OK” button.
Step 3: Access Outlook VBA Editor
To run VBA code, you have to access the VBA editor firstly, which can be achieved by the following 2 means:
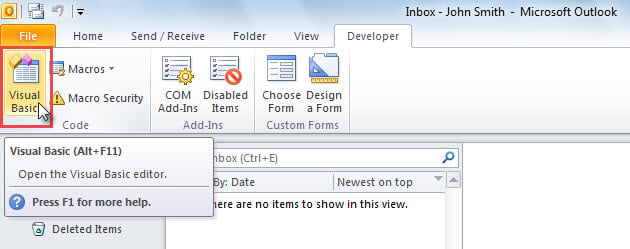
- In Outlook, under the “Developer” tab, click on the “Visual Basic” button.
- Or you can directly press “Alt + F11” key buttons.
Step 4: Add VBA Code
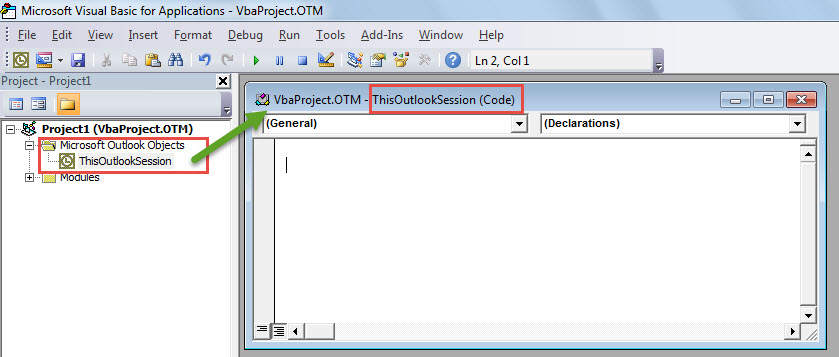
- In VBA editor, namely “Microsoft Visual Basic for Applications” window, you need to expand the “Microsoft Outlook Objects” folder on left side
- Then, double click on the “ThisOutlookSession” project to open it.
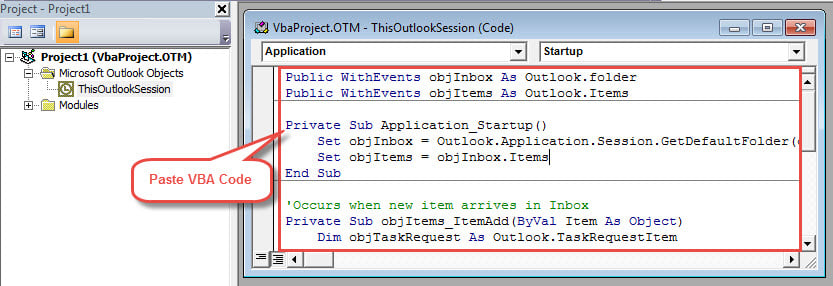
- Subsequently, you can copy and paste your VBA code into the white editing pane of this project.
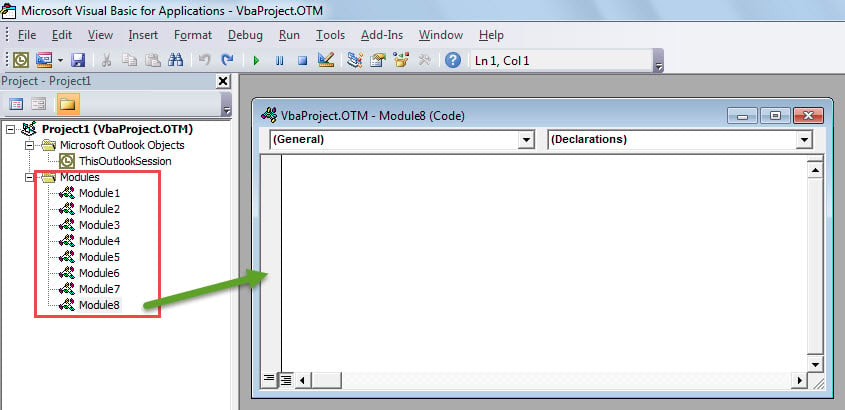
- Optionally, you can copy the VBA code into a module.
- Click “Insert” button in the menu bar.
- Choose “Module” from the drop down list.
- Then, a new module will display. Now you can copy code into the module as usual.
Note: In general, you can paste the code into either “ThisOutlookSession” or a module. But, the VBA code involving events, like “Application_Start”, must be put in “ThisOutlookSession”.
Step 5: Run VBA Code
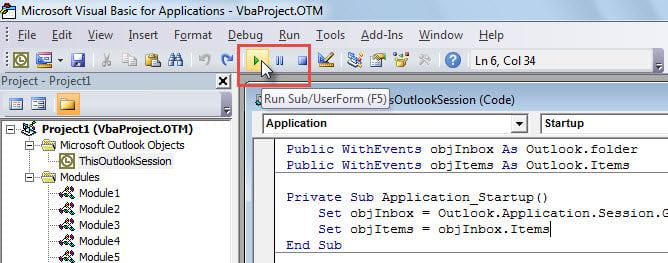
After adding the macro, you can run it. In the macro window, you can press “F5” key button or click on the “Run” button in the toolbar.
Note: For the VBA code involving events, like “Application_Start”, you ought to restart your outlook to activate it.
Optional Step: Add Macro to Quick Access Toolbar or Ribbon
If you would like to run macro in the main Outlook window instead of in the VBA editor, you can add the macro to Quick Access Toolbar or ribbon.
Add Macro to Quick Access Toolbar
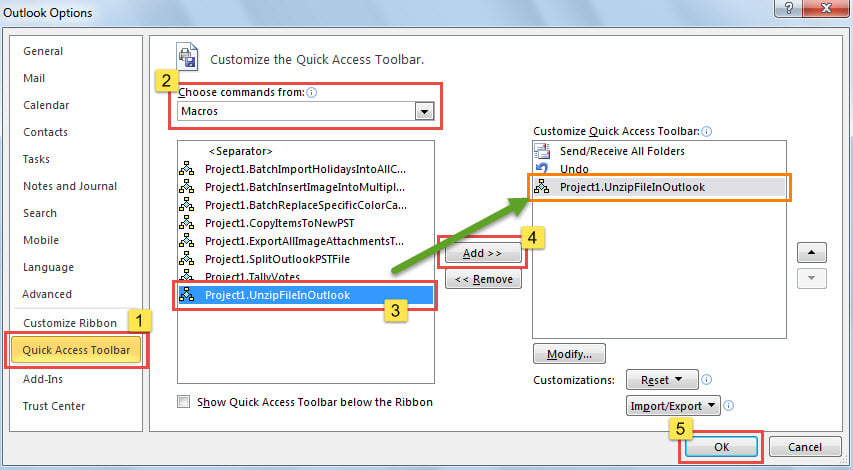
- First off, access “Outlook Options” by following the operations shown in Step 1, in which you can shift to “Quick Access Toolbar” tab.
- Next, select “Macros” from the “Choose commands from”.
- Then, in the macro list, choose a macro.
- After that, click “Add >>” button in center.
- Finally, click “OK”.
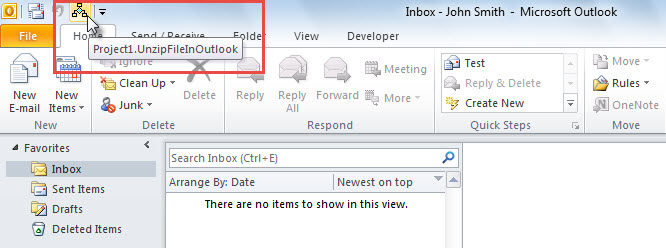
- Since then, to run this macro, you can simply click the macro button in Quick Access Toolbar.
Add Macro to Ribbon
- At first, go to “File” menu and click “Options”.
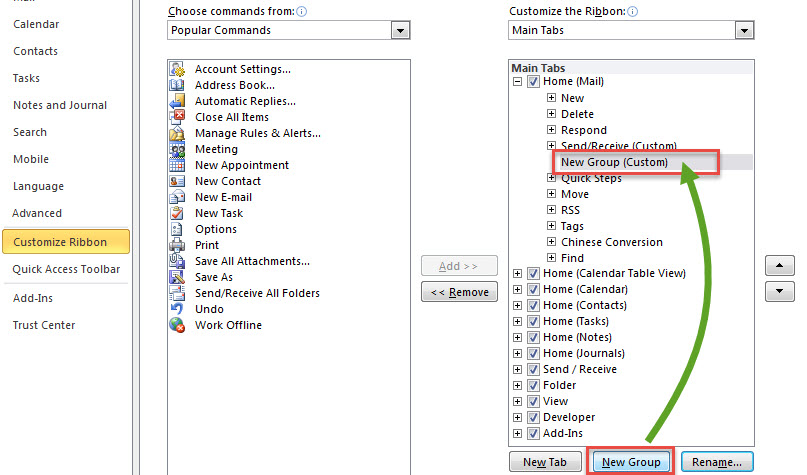
- In the subsequent “Outlook Options” window, turn to “Customize Ribbon”.
- Then, on the right side, click “New Group” button.
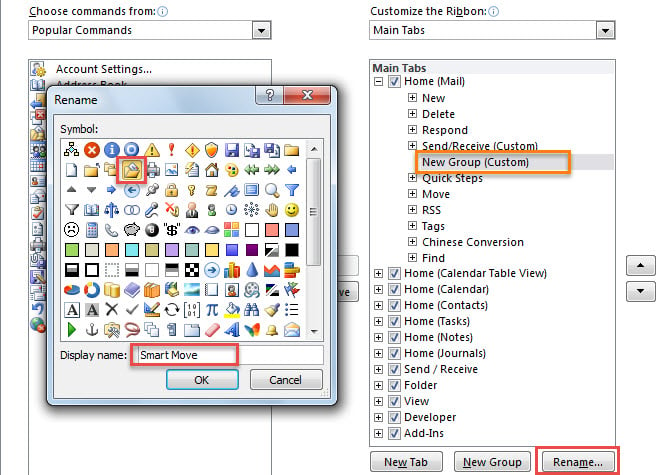
- Next, click “Rename” button.
- In the popup dialog box, specify a name and icon for the new group, such as “Smart Move” in my instance, and click “OK”.
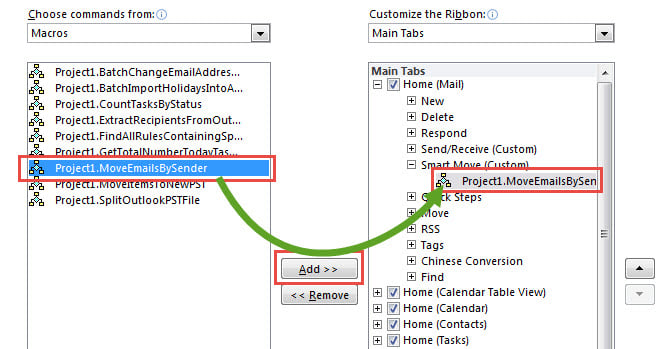
- Later, on the left side, select “Macros” from the drop-down list of “Choose Commands from”.
- After that, in the macro list, select the macro you want.
- Then, click “Add >>” button in center to add this macro to the custom group.
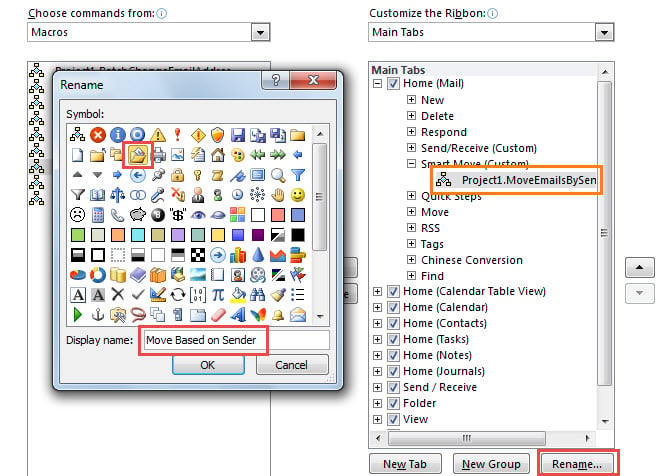
- Next, click “Rename” button.
- In the new dialog box, change the name of this macro and assign an icon to it.
- Ultimately, click a series of “OK” until getting back to Outlook main window.
- Now, you will see the new macro button in ribbon, as shown in the following screenshot.
Author Introduction:
Shirley Zhang is a data recovery expert in DataNumen, Inc., which is the world leader in data recovery technologies, including mdf recovery and outlook repair software products. For more information visit www.datanumen.com
